Proposal Groups are used to add details to customers’ proposals regarding specific subsets of equipment. Each equipment group can have a unique graphic header along with a narrative to help explain the work to be accomplished. For example, you may choose to highlight the control systems products by describing how a control system works. Additionally, you can provide specific graphic content for various equipment groups. So you might show a touchpad for the control systems and a picture of a home theater on the home theater page.
Set Up
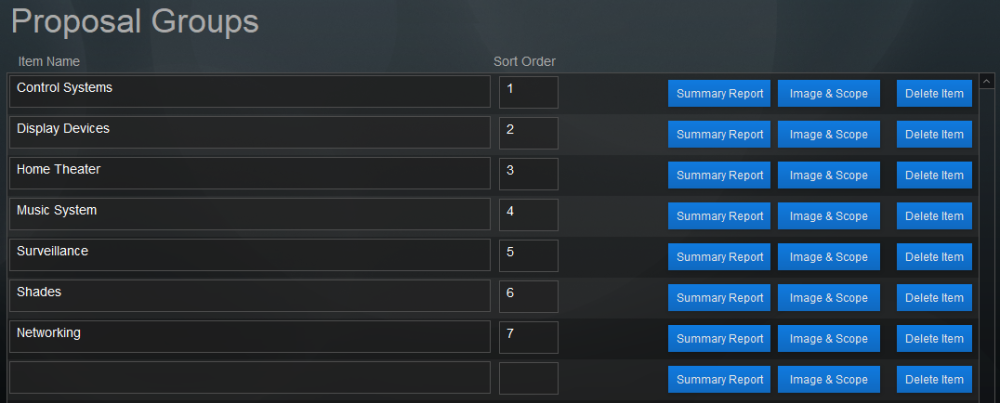
- Enter a unique Proposal Group by typing in the Item Name field.
- Organize the Proposal Groups by placing a number in the Sort Order field. The Custom Group Summary will print in the order chosen here.
- Set the number of items displayed on each summary page by clicking the Summary Report button.
- The Image & Scope button allows the customization of the header image and descriptive text per Proposal Group.
- Edit a Proposal Group item name by clicking in the field that needs to be changed.
- Click the Delete Item button to remove a particular Proposal Group.
Summary Report setup
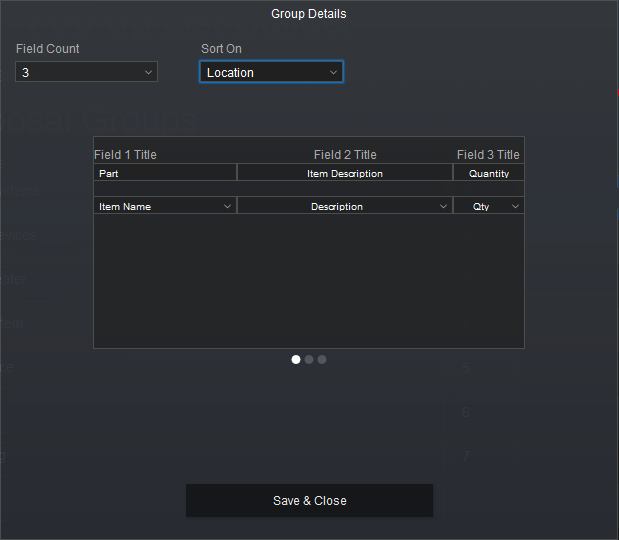
- Click the Summary Report button – a Group Details pop-over window will display.
- Choose the number of fields to display (3, 4, or 5)
- Under the Field Title, type in the name of the header you want to use.
- In the dropdown list, select the database element you want to appear under each heading.
- At the top of the window, select a sort location from the Sort dropdown.
- Click Save & Close
.
.
.
.
.
Image & Scope setup
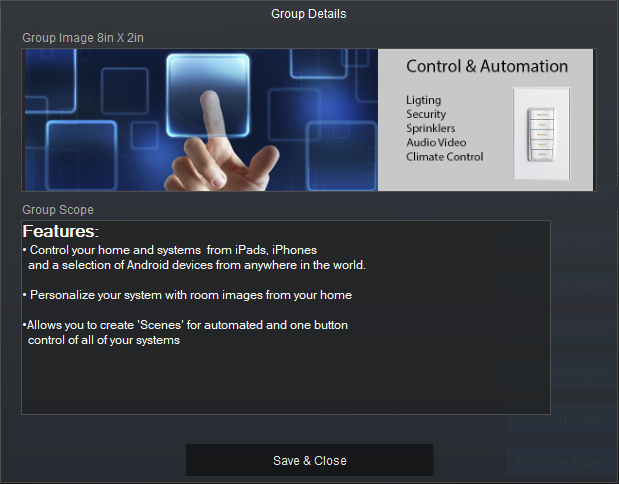
- Click the Image & Scope button – another Group Details window opens.
- Place an image in the group image field. This image is something you would have created in your paint or publishing program. For best results, this image should be 8” wide by 2” tall.
- Right-click in the field
- Choose Insert Picture…
- Navigate to the directory on your computer where the image is stored and select it.
- In the Group Scope field type the description of what this group is proposal group is for.
- Formatting options are available by using the Format menu at the top of the Filemaker window – or – right-clicking on the highlighted text and selecting a format function from the pop-up window.
- Click Save & Close
Note: The text you type in the Group Scope field is available to print on proposals when displaying the Group Scope Summary on a proposal.
Item setup
The balance of instructions for setting up Custom Group Summary is available in the Settings > Module Settings > Items.
Use
The Custom Group Summary report can be printed
- from a Proposal on the Reports tab.
- included in the Client Proposal by selecting Custom Group Summary in the print package for a proposal.
- included in the Client Contracted Sales Order, Change Order, or Client Combined Sales Order reports in the print package for a sales order.
.
.
.
.
.
.
.
.
.
.


