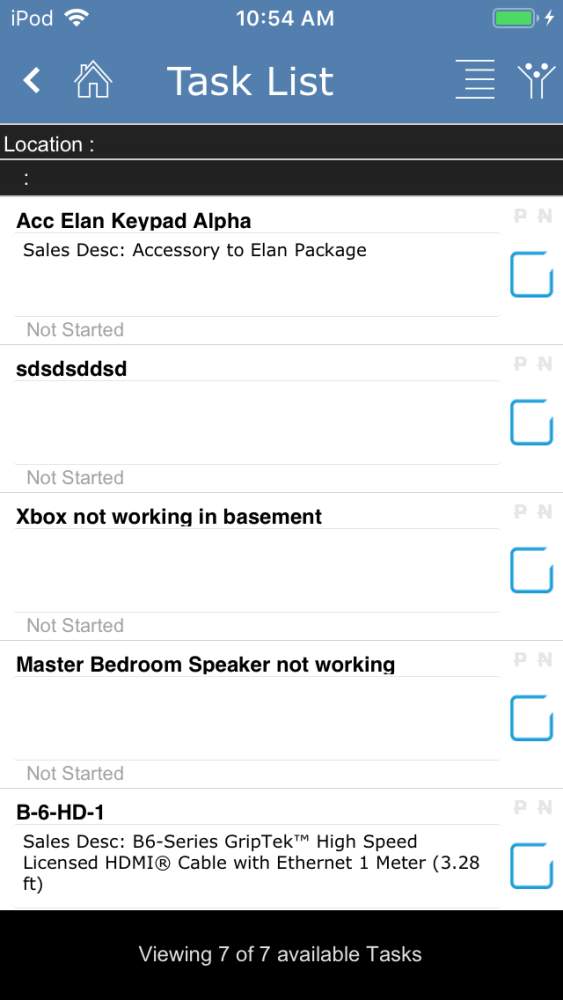
The Task List is a list of things to accomplish on a work order. Each task on the list define the following details:
- Task name – the name of the task will come from one of two places
- Part Name – as parts are added to a work order, there is an associated task that goes with it. Parts can’t install themselves. So a technician will need to complete the task of installing the part.
- Service Work – if the task is manually added to the work order, typically for a service call but also as a non-part related activity, it will be named by the person creating the task.
- P: Punch list Indicator – a punch list is a set of sub-tasks that need to be accomplished prior to the completion of the task.
- a red P on a task indicates that it has a punch list.
- a blue P indicates that the punch list items have been completed.
- a gray P means there is no punch list for that task.
- N: Notes Indicator – if a note has been added to the task by the salesperson or the service scheduler, a blue N is visible. Otherwise, empty notes are indicated by a gray N.
- Description – the description should provide additional details about the task and is typically added by the salesperson during the sales process or by a project manager/service scheduler during the creation of the work order.
- Status – task statuses are defined by a system administrator, but typically there will be a status of Not Started and Completed.
Completed Task – a check in this box completes the task and changes the status to the _Completed” status.
Above the list of tasks are two black bars, which display the sort headers of the tasks. The order of the tasks is defined by the Sort Order and Task Filters described below.
Click or tap on any task in the Task List to open it for additional Task Details.
.
.
.
.
.
.
.
Sort Order
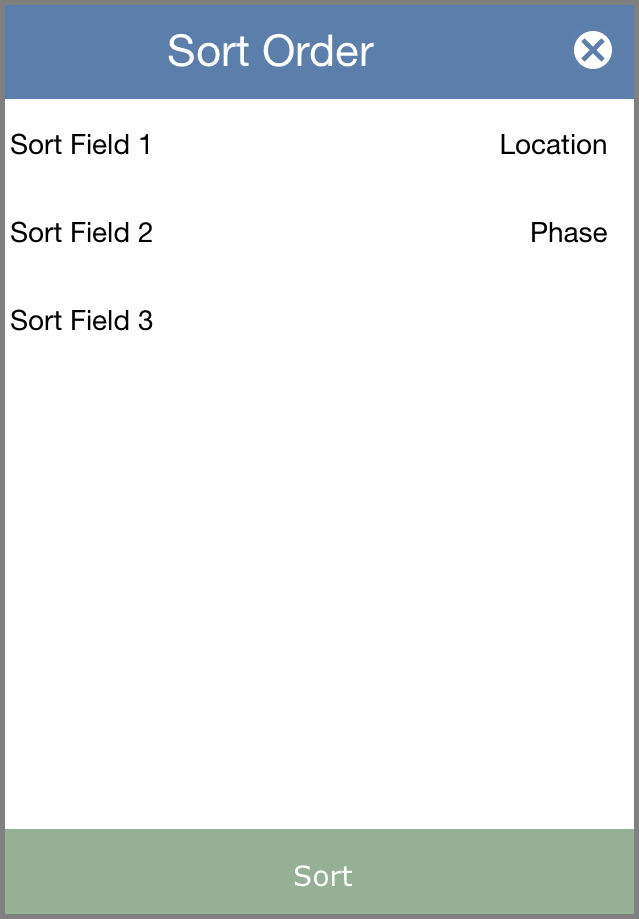
The hamburger icon in the top right corner of the Task List opens a pop-over window where you can define the order of the tasks on the list.
- Tap on Sort Field 1
- Choose from one of the available fields by tapping it
- Manufacturer – how does a task have a manufacturer? Every part sold on a job has an associated task. So the task manufacturer references the manufacturer of the associated item or part.
- Name – this is the task name. Choosing this option causes the task list to be sorted alphabetically.
- Location – is the name of the room or read where the task is to take place as defined during the sales process.
- Status – yes, tasks can have statuses, too. Most commonly these are Completed or Not Started, but your system administrator can also define other status names.
- Priority – tasks can be assigned a customized priority (determined by a system administrator in settings).
- Phase – tasks inherit the phase from the associated Part. The phase can also be modified or added
- Head End – if a head-end location is assigned to the associated part, you’ll be able to sort by that here in tasks.
- Special Note – this field is used to identify stand-alone tasks (i.e. tasks manually entered and not associated with an item).
- Alternatively, tap on a selected sort field to remove the sort name
- Repeat steps 1-3 for the Sort Field 2 and Sort Field 3, as needed.
- Tap the Sort button to close the popover window and display the list of tasks based on the sort criteria entered
If you choose multiple sort fields, the task list will sort all tasks by the first field. Then in each sorted group, the tasks will be ordered by the second sort field. This is demonstrated on the task list by a series of black header bars at the top of each section. The first black bar bears the name of Sort Field 1. Then the second black bar displays the Sort Field 2 name, and so on.
Note: Tasks that have an empty sort field will be displayed first. If you choose Location, for example, and tasks with no location defined will display first, under a blank black header bar.
Task Filters
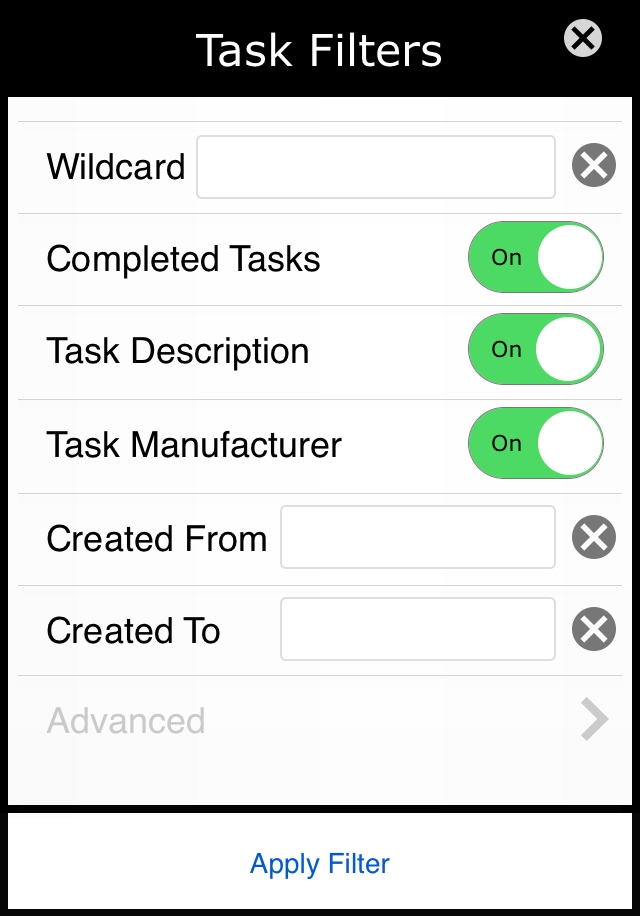
Tap the funnel icon in the top right corner of the Task List to open several filter options. Filters will cause matching tasks to be displayed on the task list.
Note: By default, the filter funnel is displayed in white. But if a filter is applied, the filter changes to an orange color.
- Wildcard – type an alpha/numeric search string here to display only tasks that match the search criteria.
- Completed Tasks – by default, completed tasks are hidden from the Task List so that only outstanding tasks are visible. Note: If this work order is linked with others, tasks can be completed by co-workers. Tasks will be hidden regardless of who completed it or on what work order it was completed. Turning this filter to On will cause all work order tasks to be displayed.
- Task Description – when toggled to On, task descriptions will be displayed on the Task List. Off hides the descriptions. (Beta feature not fully functional yet.)
- Task Manufacturer – when toggled to On, the manufacturer of the associated part will be displayed on the Task List. Off hides the manufacturer’s name. (Beta feature not fully functional yet.)
- Created From – a date entered here will show tasks created on or after this date
- Created To – a date entered here will display tasks created on or before this date
- Advanced – Coming soon, you will have a number of additional filters available. (Beta feature not fully functional yet.)
Use the Apply Filter button to re-display the task list based on the options you set.
Clearing a filter is done by clicking the gray X icon.
.
.


