Related Contacts are links to other contacts in the iPoint database. A related contact could be the contractor responsible for the work being completed or a property manager who takes care of a facility. Adding an individual or entity to a Contact helps cross-reference people to simplify communication.
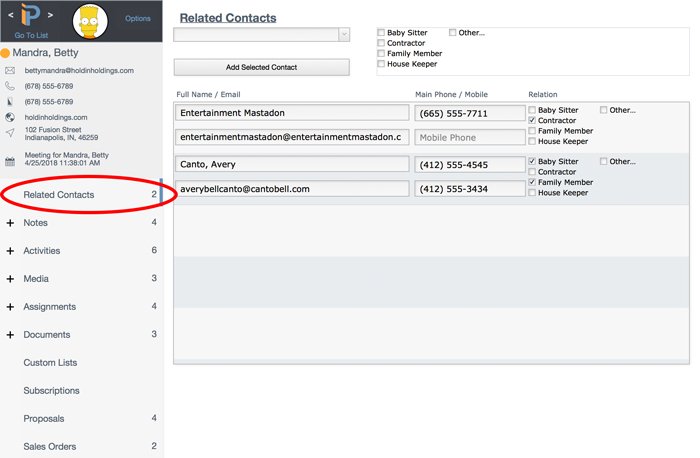
The number to the right of the Related Contacts link in the left side menu bar displays how many related contacts are associated with this record.
Click the link to display the Related Contacts in a list. For each related contact, you can see:
- Full Name
- Email address
- Main and mobile phone numbers
- Relationship to the current contact
Note: When a contact has more than three relationship types, the ellipses indicate there are additional relationships that can be viewed on the details screen.
.
.
.
Related Contact Details
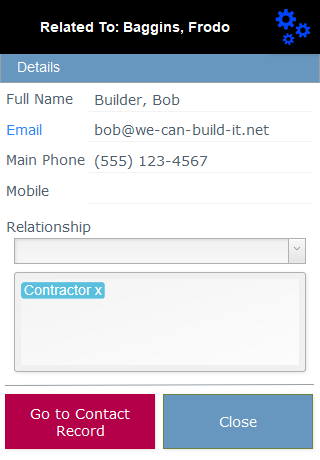
Click on a related contact in the list to view the details. And if you have appropriate permissions, you’ll also be able to edit or delete the contact as well.
- Full Name – the name of the contact as listed on their record in CRM
- Email – the main email address
- Main Phone – who you gonna call?
- Mobile – where do you call when they are on the move?
- Relationship – the dropdown menu displays preset relationships (as defined in Settings > Pop Up Lists > Contact Relations)
- However, you can also add your own relationship by clicking in the relationship field and entering your own text. This does NOT add this to the default relationship list, but only displays it here.
- Relationship List – below the dropdown is a display of all the relationship types for this contact. Click the X at the end of a relationship tag to delete it.
Go to Contact Record button will open this contact details in CRM
Close button closes the record and saves any changes made.

.
.
.
.
New Related Contact
To add a new related contact:
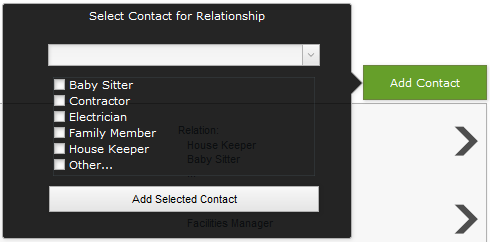
- Click the Add contact button
- Use the Dropdown list to find an existing contact in the iPoint CRM
- Click in the field and start typing to narrow down the list of options in the dropdown.
- If you enter a name that does not exist, iPoint will prompt you to add the contact when you click to add the relationship.
- Place a tick in the checkbox next to the relationship type(s) that apply to this contact.
- If the relationship type you want is not available, click the Other… checkbox to open a window where you can add a custom relationship.


