Learn all the tips, tricks, and general shout-outs in this section!
.
.
.
.
.
.
.
.
.
.
.
.
- 1. Estimate, Project, or Proposal?
- Which one should I create for my new job? Different jobs require different levels of complexity, and not all jobs need to go through the Sales Order process. Let’s look at it from the ground up…
1. Simple – One Day, In and Out, “Hang and Bang.”
This would be the most simple kind of job there is. An example would be, customer calls and wants you to mount the TV for them. You might be selling the mount, maybe they already have it, but you will only be there for a short time. You can accomplish this by simply using an Invoice or Estimate.
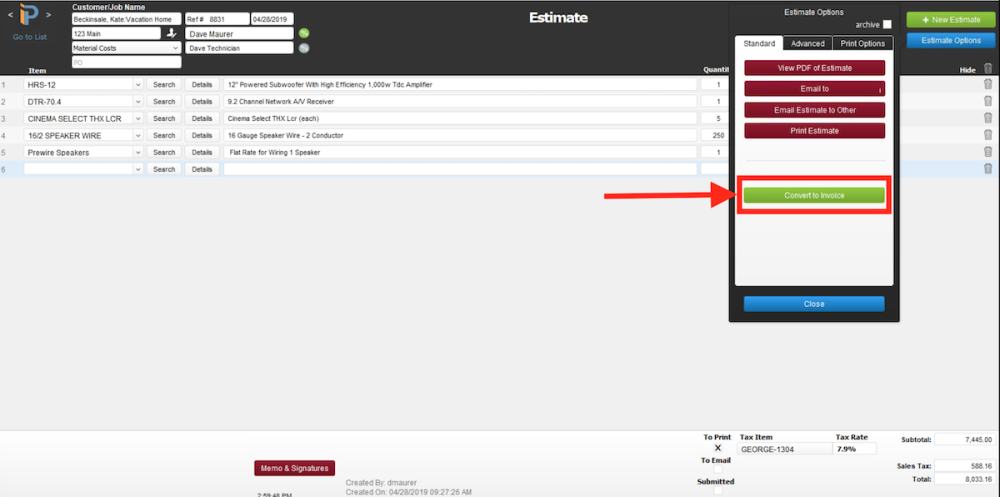
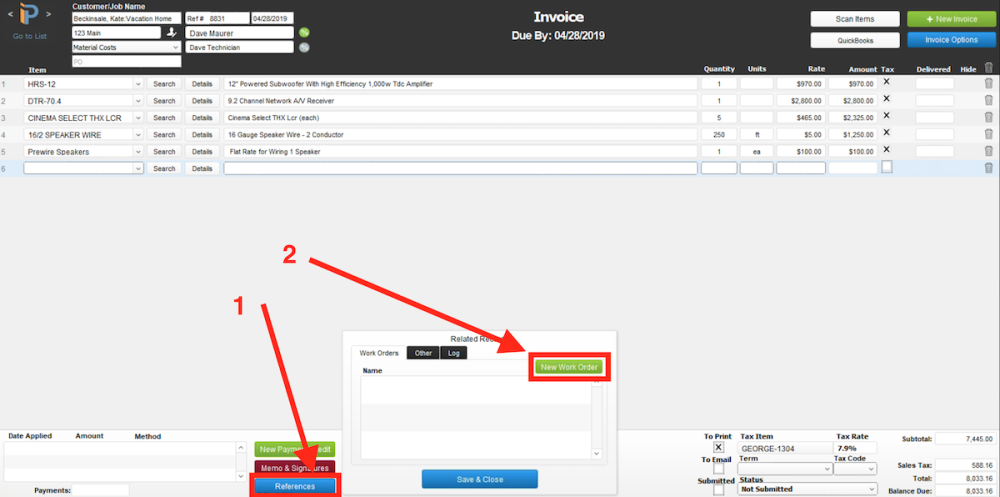
An estimate allows you to build a list of Items and Labor, just like you would on an invoice, and send it to your customer for approval. You can view the PDF, Email it directly to the Customer or someone else. Once the Customer has accepted the estimate, you can Convert the Estimate to an Invoice, Request, or Stage your Items and generate a Work Order right from the Invoice.From the invoice, you can request product, Stage from Inventory, or Deliver the product using the Product Options section of the invoice.
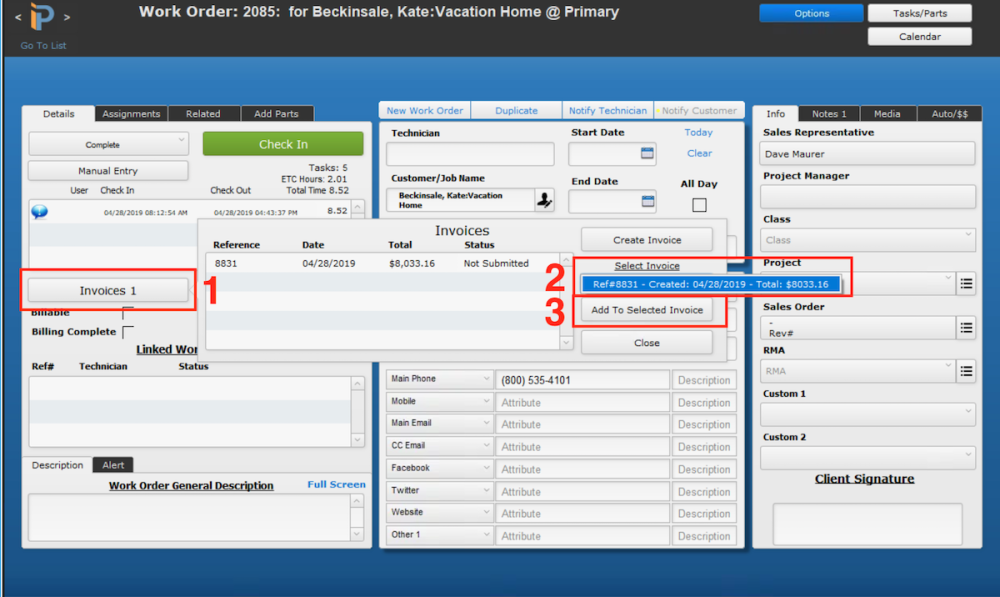
Once you have staged or delivered the Items from your Invoice, you can create your work order. By default, when you click on the Product section on the Invoice, as shown, iPoint will Auto-Deliver the Item. If you wish to choose from a Warehouse location, other than the default, visit *Settings > Module Settings > Invoices > “Do Not Auto-Deliver Product.”Once the work order has been completed, your technician can collect the invoice from the field or email the customer a Payment Portal Link. By clicking on “Invoices” from the Work Order and selecting the existing Invoice (created from the Estimate originally), iPoint will offer the user to include the actual time on-site. Depending on your agreement with the customer, you can choose to keep the Invoice as it exists or add the time from the work order.
2. Time and Materials Projects
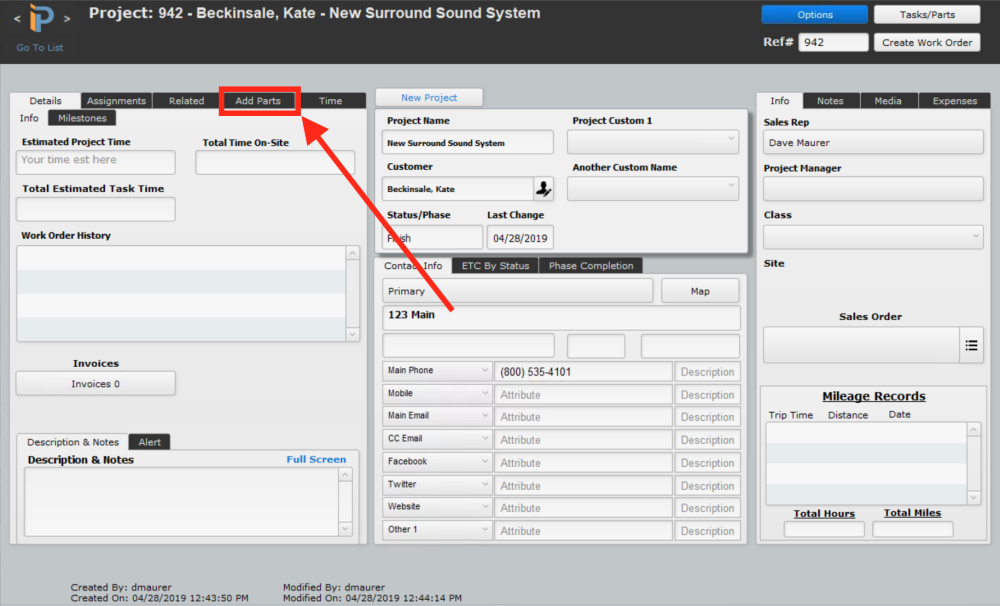
For projects that might go on for several Work Orders, you will want to create a Project to track all of your Work Orders together, along with any Added Parts that may have been necessary. For example, if you started with an Estimate, you would want to add the Items from the Estimate to your Project first, then create your Work Orders.
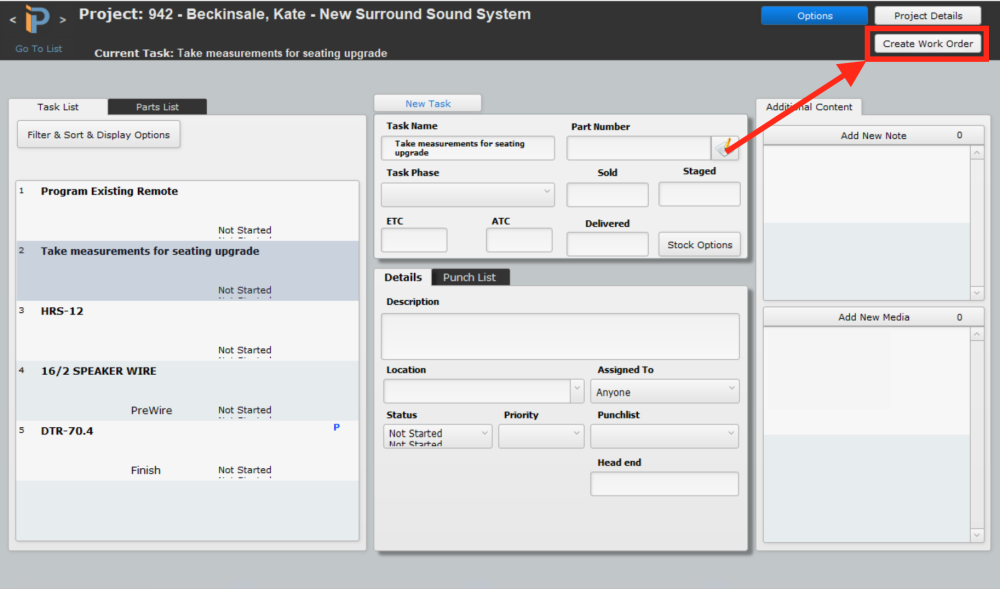
Using the Task/Parts button, you may also want to add specific tasks for your technicians to complete while on-site, in addition to the items for installation.
You now have a Project to accumulate all of your work orders, additional tasks, and parts that your team can add to as the job progresses. Continue scheduling the work orders, adding tasks and parts until the job is completed. Once you are finished, use the “Invoices” button on the Project Details screen. By clicking “Create New Invoice for All,” iPoint will create an invoice for all unbilled Work Orders, unbilled Items, and Expenses added to the Work Orders.
Proposal
For longer, phased, pre-proposed jobs, you should start with a Proposal and work your way through the revision, presentation, and conversion to a Sales Order. Using a proposal is the most flexible way to build and complete a job. We will still use Projects to manage our labor, but our Inventory Management, Scheduling, and Billing processes will be different.
- 2. Shortcuts Menu
-
Most of ya’ll probably know at least a few general keyboard shortcuts, but did you know that there’s a handy dandy Shortcuts Menu inside iPoint? These can help you zip through your job inside Designer and other parts inside iPoint.
When in iPoint, navigate to the very top menu bar and click Shortcuts. Here you can choose a shortcut action to take. You should also see the keyboard code to take the shortcut without having to click anything.
The top twelve shortcuts are only for when you are working in the Designer. Of course, you can do these actions from the options button, but this might make things go even faster for you as you work to design your proposal.
The last three shortcuts are font related. These will work whenever you are working in an editable text field such as the contract, or memo board.
- 3. Power Outages
-
It’s the middle of the night, and suddenly your phone rings. A message has popped up “WARNING – TAKE COVER NOW – BAD STORM.” Sirens start going off outside, so you rush around to prepare, but wait! Your server needs to be shut down properly, or your data can become corrupt! “Why oh why didn’t I get a UPS!?” you shout…
Don’t be that guy… okay, so we can’t exactly control the crazy weather, but we can help you be prepared! No… we are not selling tornado shelters on the side. But did you know if a power outage occurs, your server will likely not shut down correctly, and your files can become corrupt!? Then you may have to wait over two hours for us to restore it, so you don’t lose a ton of data. How much will that time cost you? I assure you, likely more than installing a battery backup, also known as an uninterruptible power supply (UPS).
Installing a UPS for your network/server is one of the most important things you can do to protect your data.
Basically, it provides power to your server in a power outage.It is vital to set up the UPS to do a soft shutdown of the server during a power outage. It gives you a few crucial extra minutes of server run-time to shut down all of your equipment properly and start up an alternate power source, like a backup generator (if you have one). Without a battery backup, you run the risk of corrupted data, as well as lost time and money.
Hurricane Season & Extended Power Outages
If you have extra time knowing there is some impending doom – I mean hurricanes – coming your way, then you may want to shut down your server for an extended period of time before the storm hits. We can help host your file temporarily – follow these steps:
1. Let us know when you want us to move your file.
2. We move it to our server.
3. We fully shut down the file on your server, so no one accidentally connects to it.
4. You can access your file on our server until the storm has passed.
5. When you’re ready to be back, we move your file back to your server, and BAM – you can connect again just like before. - 4. Text color in iPoint changes color or turns white in text fields
-
The Scenarios
- Your technician needs you to order a special part and texts you the part number in iMessage. You copy the text and paste it into the Item Wild Card Search bar, and nothing happens.
- A vendor sent a new Excel price sheet and has highlighted the new pricing using red cell color. However, when you copy and paste that information into iPoint, nothing happens.
The Explanation
When copying from a third-party program into iPoint, the software respects the formatting of the original application. So, if the text is white and our wild card search box is white, you are pasting white on white. In addition, the wildcard search box now has remembered that font color for future searches to make matters more interesting.
The Solution
- Highlight the cell with white (or any other color) text in it.
- Then, from the Filemaker menu a the top of the screen, click Format > Text Color.
- Choose the black text color.
- Viola, problem solved.
Incidentally, re-logging into iPoint also clears the color formatting you introduced with the cut and paste process.


