We’re here to help you take the guesswork out of some of the technology troubles you may encounter. In this edition of “Help! Robots are taking over the world,” we bring you the fol-low-ing:
How to Replace Parts on a Work Order
- Open the work order from your computer or iOS device
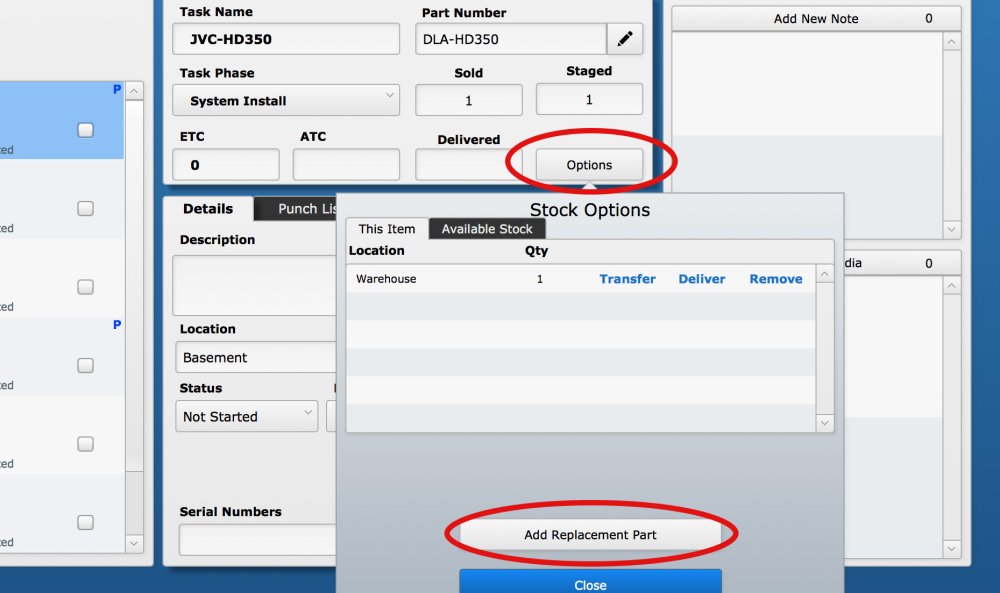
- Select the part you wish to replace
- In the part information in the center column, click the Options button
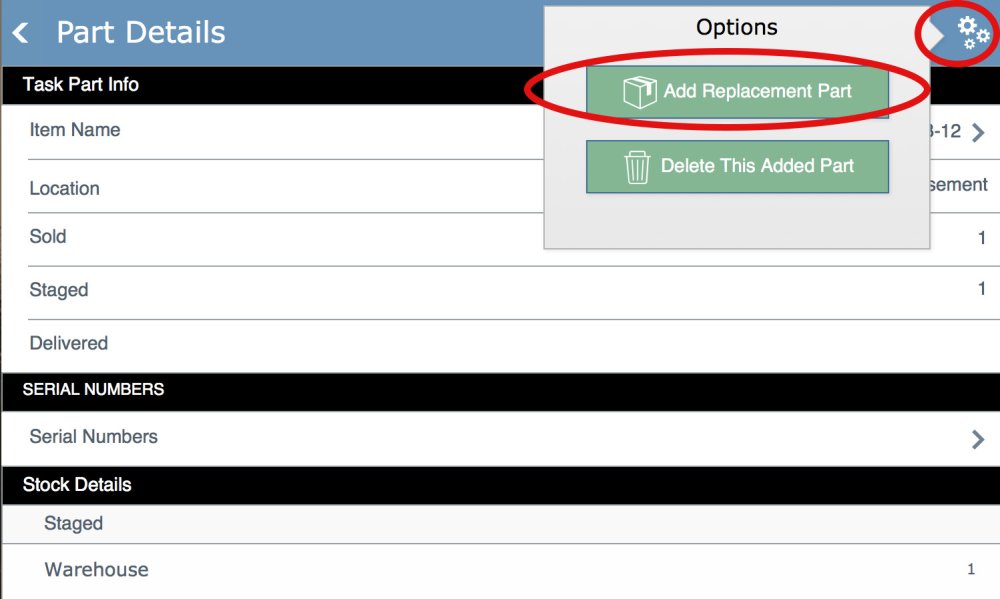
- From iOS: WO > Parts icon > Select the part > Click Gear icon at the top
- In the Popover window that opens, click the Add Replacement Part button
- Choose a replacement part
- Enter the number of replacement parts you want to add in the Enter Qty field
- Choose a location from the Staging Location dropdown list if you would like to deliver the item at this time
- Click the Save & Create Task button or the Save button
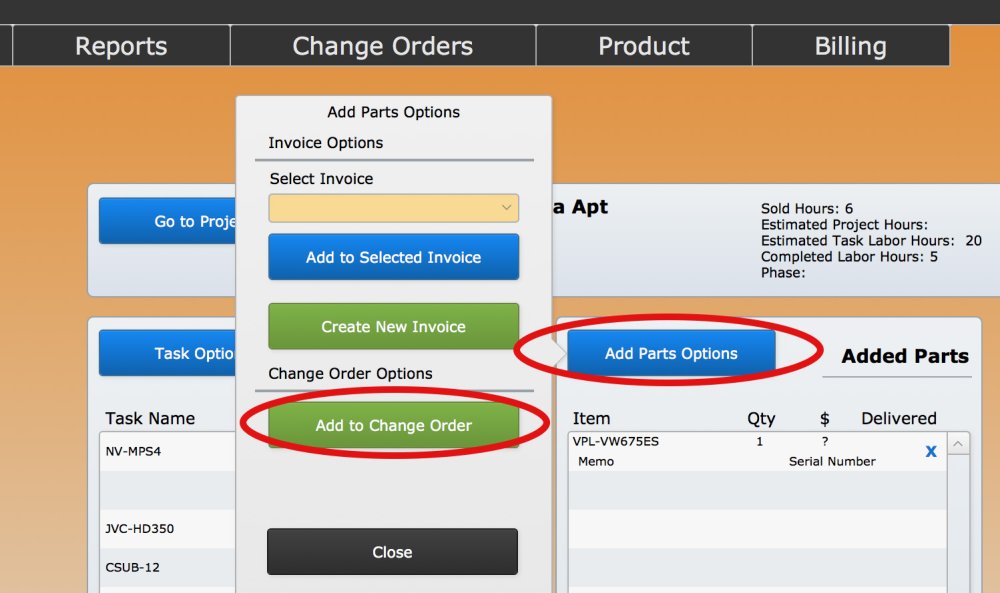
- Go to the Sales Order > Project tab
- In the Added Parts list, click the Add Parts Options button
- In the popover window, click the Add to Change Order button
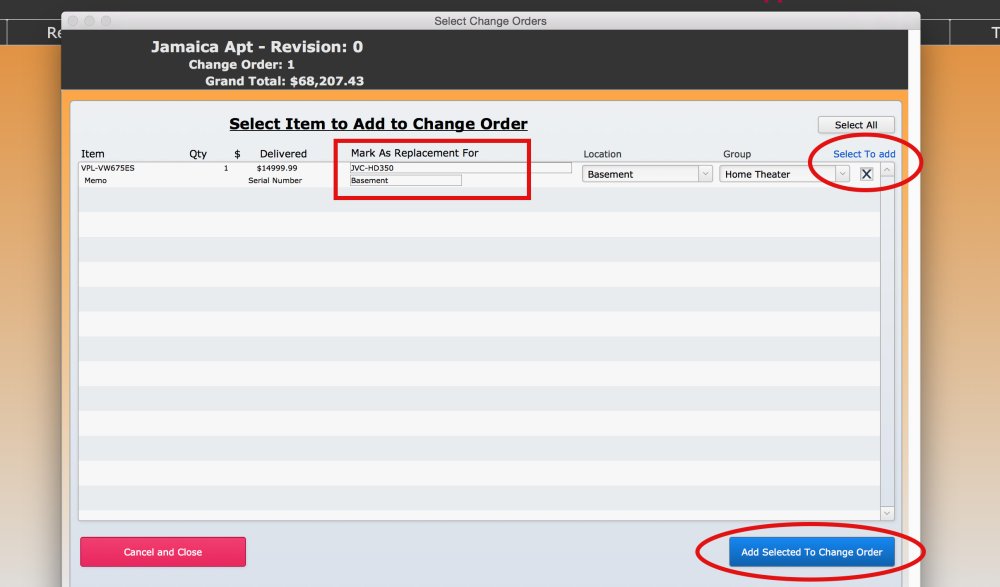
- In the Select Change Orders window that opens, select the item and add it to the change order
- The window shows the original part being replaced—jot down the original part information so you can easily remove it from the change order
- Go to the Designer and manually remove the original part (there is no automated process for this)
Last modified:
25 Oct 2023


