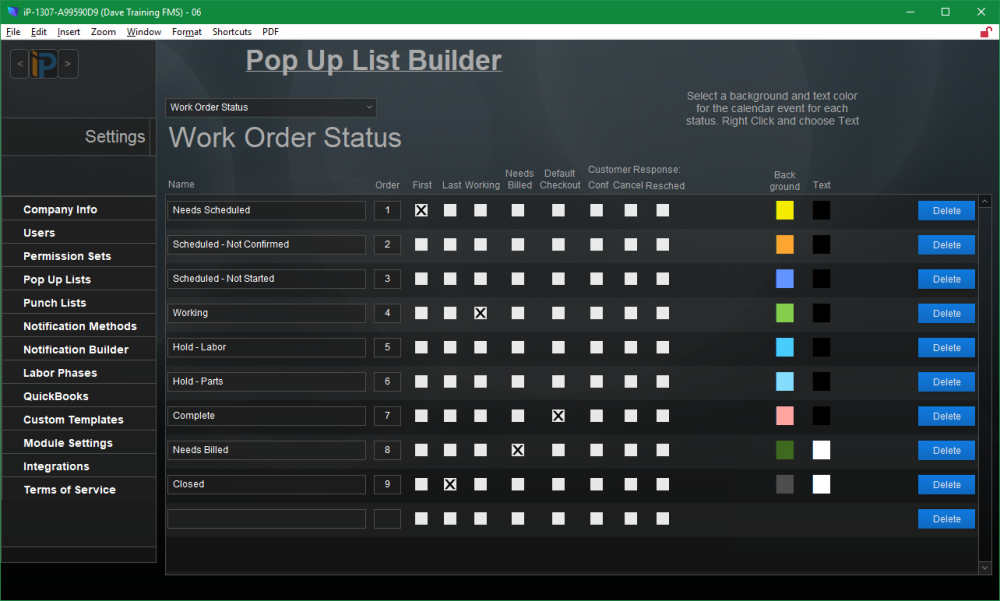
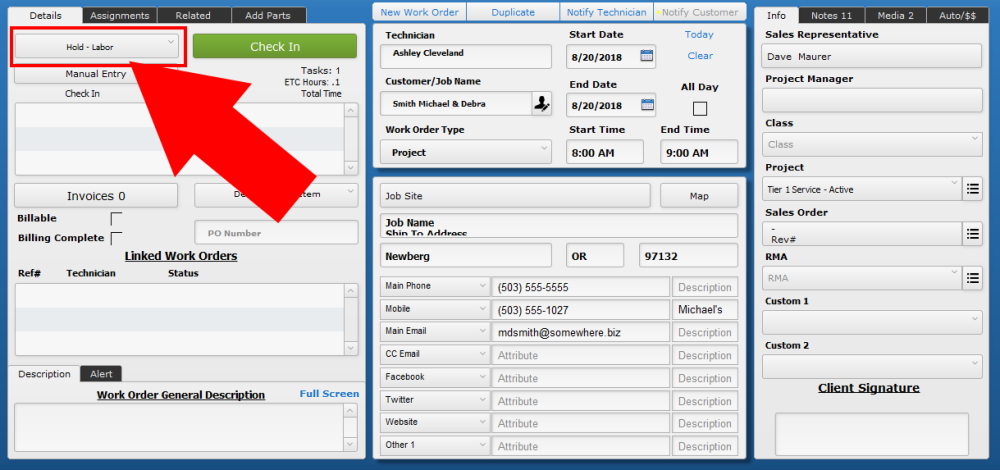
Work Order Status is used to track the various stages of a work order as scheduled, worked on, and completed.
Setup
- Navigate to Settings > Pop Up Lists and pick Tags from the dropdown menu.
- To add a status, type the status name in the last empty field of the list. iPoint will automatically add a blank status line at the end of your newly created list.
- The Order field will help you arrange the statuses to your liking. Use a whole number (1, 2, etc.) or a decimal (1.3, 2.4, etc.) to organize your statuses. If two statuses have the same sort order number, they will be sorted alphabetically.
First – This checkbox will set the status that is automatically set when a new work order is created.
Last – This checkbox is the status iPoint will look for to ensure the work order is complete during automated archiving processes. Additionally, when a work order status has been set to the last status, a pop-up window will prompt the user to archive the work order.
Working – Flags the work order as being in process.
Needs Billed – Flags the accounting staff that this work order needs to be billed, either on an invoice or through the Sales Order billing process.
Default Checkout – When a technician checks out of the work order, this is the status that will be displayed by default. It can be overridden during checkout if necessary.
Customer Response: Conf – When using the Customer Work Order Notices, the system sets this work order status when a customer confirms their appointment.
Customer Response: Cancel – If a customer clicks the cancel button on the Customer Work Order Notice, the system will change the work order status to this status.
Customer Response: Resched – this is the status a work order will display if the customer chooses to click Reschedule on the Customer Work Order Notice.
Prompt for Clock Out – a check in this box causes iPoint to do two steps when the specific Work Order Status is chosen. – New in 10.0608
- First, the technician will be prompted to log out of the work order if they haven’t already.
- Second, if the technician is clocked in on the time clock (on the dashboard), a pop-up window will also prompt them to clock out there.
- Background – When viewing the iPoint Calendar using work order status colors, this is the color of the calendar entry based on the work order status. To change the color, right-click on the colored box, choose “Text Color” and then choose the desired color.
- Text – This adjusts the font color used on the iPoint Calendar for each work order status. If you have selected a light color for the background in the step above, you will likely want to use black or another dark color for the text. Similarly, if the background color is dark, you would want to choose a light text color so it is visible on the calendar.
- The Delete button removes the specific Work Order Status from the list.
Use
- The Work Order status helps users sort the work order list by a specific status.
- When customers confirm or decline a scheduled job confirmation email, iPoint updates the work order status.
- Statuses can help drive billing and parts ordering processes.
- The system can also use these statuses to drive notifications (which are set up in Settings > Notification Builder
.
iPoint Version:
10.0608
Last modified:
29 Dec 2021


