
 Document Builder - Documents
The documents tab of the Document Builder is where multiple pages, created on the Pages, are combined to make one cohesive document. For example, a customer payment letter might combine a cover letter, payment terms, and payment receipt.
The main body of the Documents tab has three columns.
First is a List of Documents created in the builder. At the top is a drop-down box where users can choose between iPoint created templates or the templates created by your company. The Fetch Templates option will pull down any newly created templates directly from iPoint. The iPoint curated templates have a small document icon in front of the name while company-created templates do not.
Clicking on a document in the list will fill the middle and right sections with details about that selected document.
The second section is the Preview of the document selected from the list to the left. Clicking on the preview opens an editor window which is described in the Creating or Editing a Document section below.
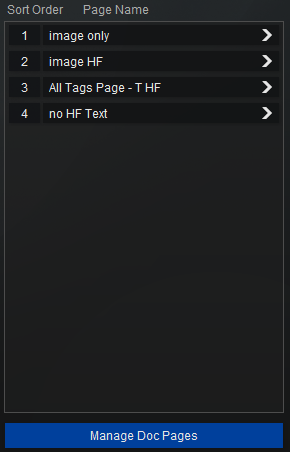
The third section is the Sort Order where multiple Pages are grouped together to create a single document. The list displays the pages associated with the document selected from the list of documents on the left.
- To add a page to the list, click the Manage Doc Pages button to open a pop-up list showing all pages created in iPoint. Choose one or multiple pages by placing a star next to the page(s) to be included.
- Use the term filter wildcard to narrow down the list of pages available.
- Use the gears in the top right corner of the Add/Remove Pages dialogue to Add All or Remove All pages from this document.
- Click the Close button to close the pop-up window.
- Click the page number in front of any page to change the order either up one line, down one line, or move to a specific position.
- Each page in the list has an arrow. Clicking on the arrow opens the Print Preview window.
At the top right corner of the Documents window are three buttons
- New Document – creates a blank document for you to edit.
- Options – creates a copy of the selected document. This is useful for making minor changes to an existing document while keeping the original intact.
- Manage Doc Pages – opens a pop-over window where you can quickly add or remove pages created on the Pages (tab) to the document. Simply click to place a star next to the pages to be included in this document.
.
.
.
.
.
.
 Document Builder Options
The Options button opens a pop-up window where you can
- Duplicate the selected document – The perfect option for making small modifications to an existing document, while maintaining the original document.
- Delete the selected document – This is how a document is removed when it is no longer needed.
- Download Sample Images – In order to assist in formatting the various graphics used in the Document Builder, we’ve created image templates that you can download. Clicking the download button will save the templates to your computer where you can open them and modify with your favorite graphics editing software, creating personalized images that reflect your company.
- Fetch Sample Documents from iPoint – which downloads sample documents from the iPoint that you can duplicate and modify for use in your company.
Creating or Editing a Document
 Document Builder Options
Access the Document builder by clicking on the New Document button or on the document preview image on the document tab of the builder.
The Options window provides basic setup options and merge tags to help create the document.
- Think of Merge Tags as hooks to the iPoint database. This is where the customization happens. Scroll through the list to find the tag you want to insert or use the filter at the top of the list to quickly narrow down the filters. For example, if the merge tag {Sales Rep Name} is used, the document will print the name of the sales rep for the specific sales order. Or inserting the {Proposal Address} merge tag prints the job site address as listed on the proposal.
- Enter Preview Mode button opens a preview window where each page can be viewed, combining the document settings with the specific pages being generated.
- Download Image Templates places blank image file templates on your computer desktop which can be used to customize graphics used. See the Image Tips section of the Pages Document Builder for more details.
 Document Builder Editor
The Editor window provides controls to edit the header and footer section of the document as well as some specific document settings.
- The Header and Footer sections of the document are comprised of four layers, Left, Center, Right, and Image.
- The header image layer holds a PNG or JPG graphic image that is 576 pixels wide by 72 pixels tall. Create this image in your favorite graphics software and then import by right-clicking on the image container. Choose the Insert Picture option in the pop-over window to navigate to a directory on your computer where the image is stored.
- The footer image layer also holds a PNG or JPG graphics image. But this one is a bit smaller, 576 pixels wide by 42 pixels tall. Use the right-click process to import a graphic as described above.
- Selecting the left layer on either the header or footer opens a text box. Text entered here will be justified left.
- Text entered on the center layer will be centered horizontally on the header or footer.
- Right justified text is entered in the header or footer’s right layer.
- The font, size, style, and color of text entered on the header and footer can be adjusted by right-clicking on the highlighted text and choosing one of the formatting options.
- The All button displays all four layers simultaneously making it easier to see how the layers will display when printed.
- The Header and Footers are also controlled by the Customer Template for Proposal Documents
- The image and text are treated separately so you can put a custom image on the document but the text from the custom template will display or vice versa.
- If you want just the image from the document and not to show the text from the custom template, then add a space in the text of the document header and that will override the text from the custom template.
- The Settings section of the Editor window provides greater control over how the document prints.
![]() Hide Page Numbers on Pages will prevent the automatic page numbers printed on each page.
Hide Page Numbers on Pages will prevent the automatic page numbers printed on each page.
![]() Full Bleed Printing is used when a graphic image should go clear to the edge of the printed page rather than showing a white margin. Note that some printers may not support full bleed printing.
Full Bleed Printing is used when a graphic image should go clear to the edge of the printed page rather than showing a white margin. Note that some printers may not support full bleed printing.
- Used in Module… defines where in the iPoint software this document can be used.
- Proposal/Sales Order – available when printing the Client Proposal or Client Sales Orders/Change Order reports.
- Payment Receipt – available when receiving a payment from the customer in the Payments Details window.
- Used in Module… defines where in the iPoint software this document can be used.
- The Close button closes the Document Builder.