
 Custom Template Executive Summary Options
When printing a proposal, sales order, or change order, you have the option to include a summary page showing prices broken down by:
- Group Summary – equipment is categorized by groups (as defined on the item field in Item Details). The Group Summary report lists the totals for each group of equipment and labor. Use this section to determine how the group summary header appears.
- Location Summary – parts and services can be assigned to a specific location on the proposal/sales order. The Location Summary report breaks out the price for parts and labor by location in the design. Use this section to customize the location summary header.
- Phase Summary – parts are assigned a job phase (either on the Item Details or modified on the proposal/sales order). The Phase Summary report shows how much each phase of the job will cost. This section defines the header display.
.
.
.
.
.
 Default Summary Page
By default, a summary page uses the template’s header and footer. And it shows the summary sub-sections and the prices divided by separator lines. Finally, at the bottom, you’ll find the price summaries as defined on the Options tab.
General Settings
At the top of the Executive Summary tab, you can define some basic settings:
![]() Show Grand Total at bottom of Summary – with this box checked, the total of the various categories will be displayed directly under the last line of the summary.
Show Grand Total at bottom of Summary – with this box checked, the total of the various categories will be displayed directly under the last line of the summary.
![]() Show Grand Summary at bottom of Summary – with this box checked, the total of the various categories will be displayed as setup on Options > Summary Options > Summary Type.
Show Grand Summary at bottom of Summary – with this box checked, the total of the various categories will be displayed as setup on Options > Summary Options > Summary Type.
![]() Hide Divider Lines on Summary – check this box to remove the divider lines between the sections of the executive summary. Leave the box clear to print the divider lines.
Hide Divider Lines on Summary – check this box to remove the divider lines between the sections of the executive summary. Leave the box clear to print the divider lines.
Summary Title Background Graphic – an image in this box acts as a background to the summary titles that you will define below.
- To add an image, right-click in the image container field and select “Insert Picture.”
- Now, you can navigate to the image on your computer to load it into iPoint.
- Note: Images are created in your third-party graphics software and imported into iPoint using this method.
.
 Modified Summary Page
Page Specific Settings
You can customize each of the three pages to display a header image, print a description, and modify how the totals are printed at the bottom of the summary. You will note that the settings below have three sections dedicated to each of the summary pages. Since these all function the same, we’ll provide one set of instructions. Just be sure you scroll to the appropriate place in settings to adjust the desired summary page.
Summary Title
- Type the desired new title in the corresponding sections Title field to add a title to the page.
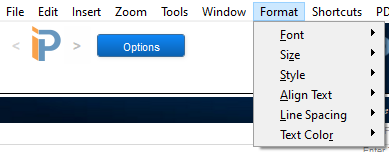
- Formatting options are available using the Filemaker Format menu at the top of the screen to adjust font, style, size, and color
![]()
- Remember that any title you enter will be printed on top of the Summary Title Background Grapic defined above
Summary Picture
You can insert a picture at the top of each summary page by selecting the Summary Picture tab for the appropriate page. For example, in our sample to the right, we added the Group Summary image.
- Right-click in the picture container to reveal a popover menu.
- Click Insert Picture… to open a computer dialogue box so you can navigate to the directory on your computer where the image is stored.
- Alternately, if you have the image on your computer clipboard, you can right-click in the image field and paste it.
- Note: Summary picture dimensions need to be 8in by 3in (600px by 225px) and in the PNG image format.
 Summary Leading Text tab
Leading Text
To include text describing the summary page’s purpose, click the Summary Leading Text tab of the appropriate page.
- The text field is three layers of text. Click one of the three dots at the bottom of the field to select:
- Left justified text layer
- Center justified text layer
- Right justified text layer
- Use the FileMaker Format menu to change fonts, size, style, and color
- Click outside of the text box to see how the text layers interact with each other.
- Use blank spaces (carriage returns) to move text further down the page
- At the right side of the text box you’ll see Select Merge Text – this dropdown has a list of information hooks that pull details from whatever proposal is being printed.
- Choose the dropdown merge text you want to use
- Click your cursor on the text field in the location where you want the Merge Text
- Click the Insert button
- For a complete description of the Merge Text options, click here.
Summary Totals
The totals on each summary page are defined on the Summary Options tab of the Custom Template. However, you can change the name of the Grand Total Name by entering text in the Grand Total Name Override field.
This field is activated by checking the Show Grand Total at bottom of Summary button defined in the General Settings section above.
Print an Executive Summary page
- Go to the Proposal or Sales Order
- Click the Reports (tab)
- Click Client Proposal (button)
- Click the Options (button)
- Click an export option (View or Save PDF, Email, or Save in Docs)
- In the print pop-up window, choose Summary by Group, Summary by Location, or Summary by Phase.
- Your Executive Summary customizations will appear on the respective page.