
When items are received for a job, iPoint can generate Product Tracking Labels to help identify products that have been allocated. These labels are completely customizable in Settings > Module Settings > Items. Print these labels during receiving and apply them to the product boxes. That way, anyone who picks up a part can see that it is already allocated to a job and should not be used as general stock.
Another significant benefit of Product Tracking Labels is the ability for technicians to scan items as they transfer them to their vans and then again as they deliver the product to the customer. Using their iOS device, a tech no longer needs to hunt through a list of items to find what is to be delivered. Instead, they scan the QR code and iPoint will match up the part with the work order delivery line.
Tracking Labels
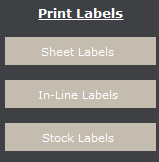
Tracking Labels can be printed on either an 8 1/2 × 11 sheet of labels or on an in-line printer, where just the right number of labels can be printed. In either case, the process is the same. Click the appropriate button and then choose your printing choice:
- All – prints a Tracking Label for every part on the Purchase Order
- Received – prints Tracking Labels only for items that have been received
- Selected – prints labels for those items that have a checkbox in the SEL column of the PO
Some Important Notes:
- iPoint only prints Tracking Labels for products that are allocated to a job. Stock transactions do not get tracking labels since they are not specified for a particular job.
- Tracking labels are customizable to include just the details you want.
![]()
- If a received item doesn’t have a serial number and is marked Serial Number Required on the Item Details in the Items Module, no Tracking Label will be printed.
- When printing labels, you can choose how many to print using your computer’s print dialogue box.
Note: Click Here for a recommended list of equipment and labels with links to order through Amazon.
 Display Label
Stock Labels
Another type of label you can print are Stock Labels, also called Shelf Tags. These labels are generally placed on bins or shelf locations where the items are stored in the warehouse or service van.
To activate the Stock Labels button, go to Settings > Manual Settings > POs and place a check in the Enable PO Item Stock Labels option.
Again, you can choose to print:
- All – prints a Stock Label for every part on the Purchase Order
- Received – prints Stock Labels only for items that have been received
- Selected – prints labels for those items that have a checkbox in the SEL column of the PO
Note: Stock Labels can be printed for all items unlike the Tracking Labels described above.