The proposal Setup tab provides the skeleton of the proposal. These details are generally entered when the proposal is initially set up and drive how the proposal and subsequent sales order function.
Custom Data List
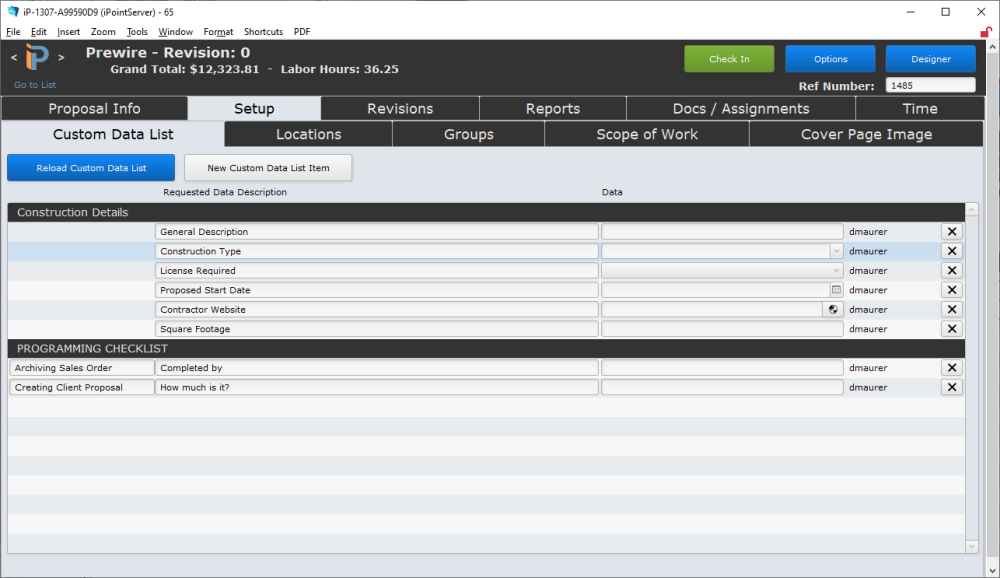
The Custom Data List gives you the opportunity to track details on a job that have not been pre-defined in iPoint. Custom Data Lists are defined by a system administrator in Settings. These custom lists can be set to require specific details before entering different phases of the proposal and sales order processes. [ Read More ]
As users, there are a couple of options for you.
If you’ve messed up on the custom data that was requested, or if the wrong custom data list was assigned to the job, you can push the Reload Custom Data List button where you will be printed with two options.
- Add New Items from Master – this will pull in any missing data lists from settings. These could be missing because they were deleted here on the data list tab, or because new lists have been added since the proposal was created.
- First choose the custom list your want to pull in and then push the blue button. Any missing Custom Data Lists will be added back to the proposal.
- Delete All and Reload Master – this is the “oops” button and does just what it says. All of the data lists on the proposal will be wiped clean and the new list will be pulled in as shiny new fields for you to complete.
- Again, choose the custom list you want to pull in and then push the red button.

You can always create a Custom Data List Item for the proposal by clicking this button. New list items only appear on this proposal and do not affect the master Custom Data List or other proposals.
- New Item Enter the “prompt” for the list item
- If the list item is required, choose the Required Before option.
- Most of the required options are self-explanatory. But it is worth pointing out that an approved proposal becomes a sales order. So the bottom half of the required options apply to the job once it has been approved and converted to a sales order.
Note: You can only create text items here. If you want to create a dropdown list, date, or other field types, you’ll have to go to the Settings module to do that.
The data list itself shows:
- Requirement – if the data element is required prior to a specific phase, the requirement is listed first
- Requested Data Description – this is the text prompt for what information is being sought
- Data – here is the answer to the data request – someone needs to enter this stuff
- User – the user name of the individual who added the custom data list to the proposal
- Delete button – push this button to delete the individual data list line
Locations
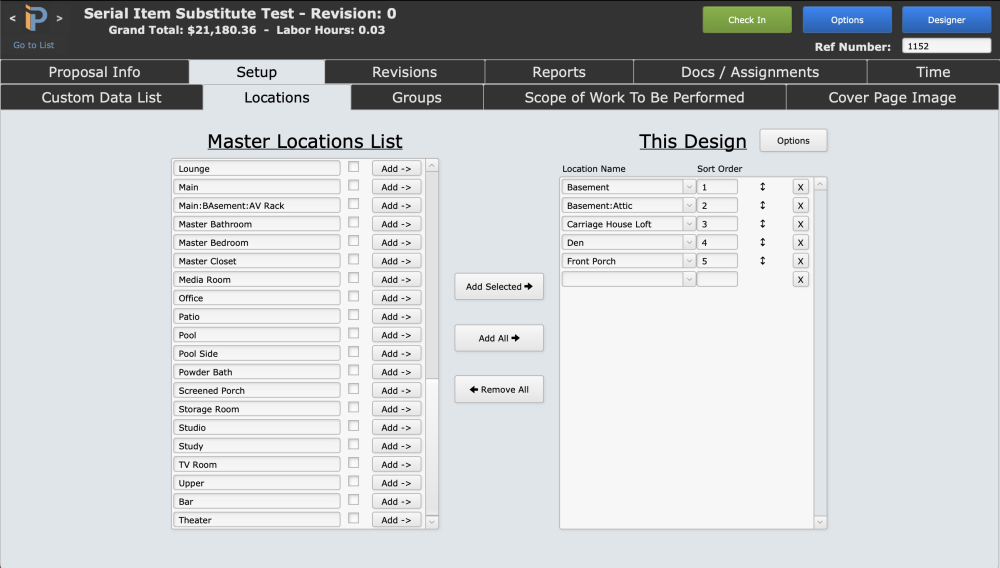
Locations help organize parts and labor on the proposal. When you add things you can define where they are installed by choosing a location. Most companies use room names for their locations.
Master Location List
On the left side is a list of default locations defined in Settings > Pop Up Lists > Room Names. These defaults can be added to the locations used on this design in three ways:
- Click the Add -> button next to the room you want in the design
- Place a check in the box next to each room you want to be added, then push the Add Selected -> button
- Click Add All -> to have every default location added
- Click <-Remove All button to remove all locations from this design
This Design
The list of locations that really matter are those that appear in the This Design column. These locations are added in a number of different ways:
- The customer may have default locations defined that are added to the proposal on creation [ Read More ]
- From the Master Location List as we described above
- Click the dropdown arrow at the end of the location box and choose from a list. (Hint, these are the same locations you see in the Master Location List).
- Manually added by typing in the last empty location box. Adding a location automatically creates a new blank box, so you can add as many locations as your heart desires.
Now that you have the locations on your design, you need to put them in order. Does the order really matter? Only if you care how the locations appear on your customer’s printed proposal!
To reorganize the locations you can:
- change the number after the location. The locations will appear in numeric order. If there are two locations with the same number, then they are sorted alphabetically
- use the arrow “handles” to drag the location where you want it to be. You’ll see that iPoint automatically adjusts the numbers to make it fit numerically
- use the Options button to Sort Locations A-Z – all locations will be listed alphabetically
- use the X button to delete a location from the list
While we are talking about Options there is a green button Save This Design Locations to Customer. You’ll recall a bit earlier we stated that a customer can have locations defined in CRM so that proposals can have their locations generated automatically. If you really like the new locations you’ve just arranged, pushing this button will save the current locations to the customer’s default locations.
Groups
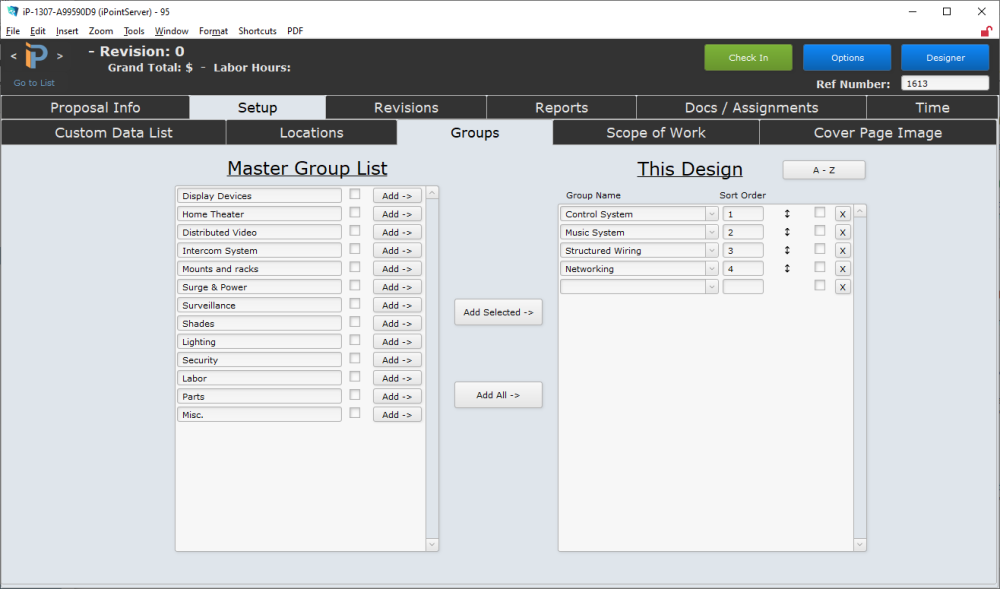
Similar to the Locations described above, Groups are a way to categorize equipment that is placed on a proposal. There is a field on the Item Details screen where you can define a Default Proposal Group. But parts can be adjusted to appear in a different group.
Master Group List
On the left side is a list of default groups defined in Settings > Pop Up Lists > Proposal Groups. These defaults can be added to the groupss used on this design in three ways:
- Click the Add -> button next to the group name you want in the design
- Place a check in the box next to each group to be added, then push the Add Selected -> button
- Click Add All -> to have every default group added
This Design
The list of groups that affect the proposal appears in the This Design column. These groups are added in a number of different ways:
- From the Master Group List as we described above
- Click the dropdown arrow at the end of the group box and choose from a list.
- Manually added by typing in the last empty group box. Adding a group automatically creates a new blank box, so you can add a lot more groups!
- When in Designer, adding a part with a default group that is not already in this list will cause the group name to also appear here.
Now that you have the groups on your design, you need to put them in order. And just like the locations above, the order of the groups here defines the order of the groups on the printed proposal.
To reorganize the groups you can:
- change the number after the location. The locations will appear in numeric order. If there are two locations with the same number, then they are sorted alphabetically – New in 9.1113
- use the arrow “handles” to drag the group where you want it to appear in the list
- use the A-Z button to sort the groups alphabetically
- place a check in the checkbox (
) to hide that group from the Custom Group Summary report [ Read More ]
- the black X button is the magic eraser and deletes the associated group
Scope of Work
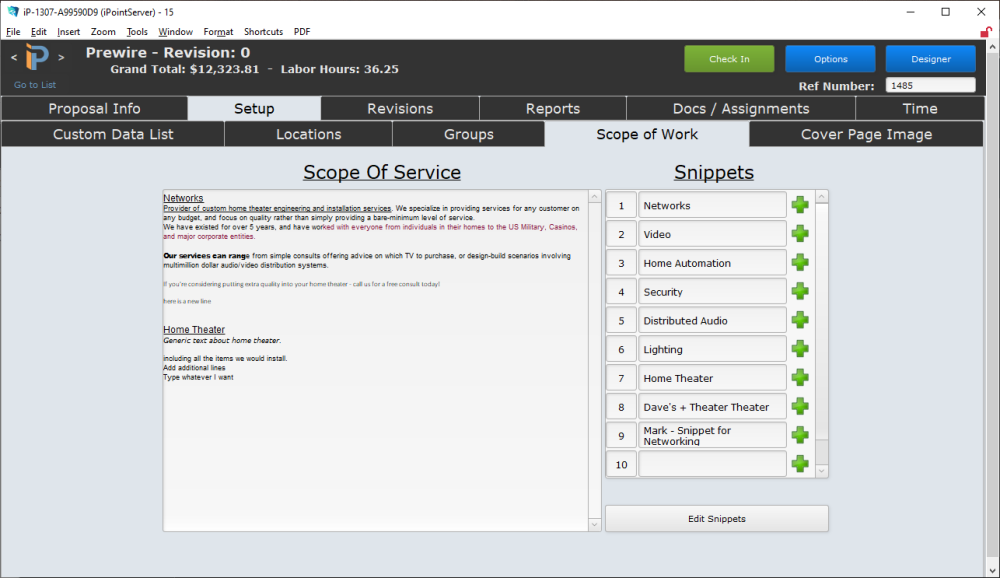
The Scope of Work is a general description of the job you are doing for your customer. You might consider this the plain English description of the work, where the Designer is the line item detail of widgets and whatsits.
The verbiage entered here is available to be included on a Scope of Work page when you are printing the proposal.
Scope of Service
To write a scope of work, place your cursor in the large Scope of Service field, and type what you want the customer to see. Then, using the FileMaker Format menu, you can adjust the font, size, style, alignment, and color to make the text graphically pleasing.
Snippets
As you write more and more proposals you will likely find that there are some paragraphs that you repeat over and over again. For example, you may have the same Network description every time you sell network services to your customers. Snippets simplify the entry of recurring text. Just click the green plus ( ) next to the paragraph you want to include in the Scope and the text will be added to the Scope of Service window.
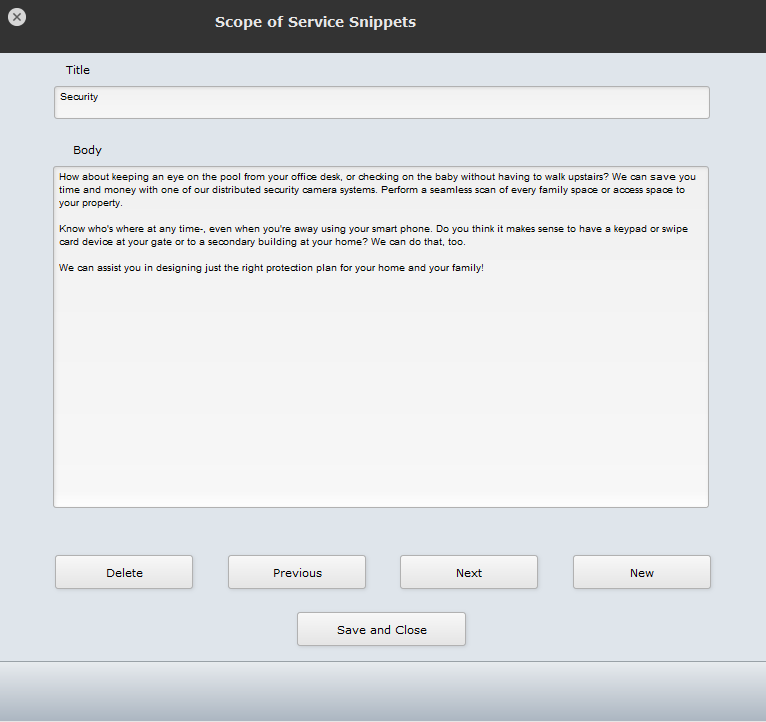
Clicking on the Snippet name will open the edit window where you can adjust the text in the snippet. the FileMaker Format menu works here as well. Once you have completed the snippet edit, click the Save and Close button at the bottom to make it available for use. Keep in mind that Snippets are global and any user with access to Proposals will be able to use the Snippets you create. For that reason, it is a good idea to come up with company-wide Snippets as the list could get very long if every user creates their own version of a Network paragraph, for example.

The Scope of Service Snippets window is also available on the Scope of Work tab by clicking the Edit Snippets button. Once open, use the following buttons to make changes to the Snippets catalogue.
- Delete – removes the displayed Snippet forever! Note: This does not affect scopes of work where the text was already added. It only deletes it from the available options for future use.
- Previous – moves to the Snippet immediately preceding the displayed text
- Next – moves to the next Snippet in the list
- New – creates a blank Snippet
- The Title field will be used as a header for the text when added to a scope
- The Body field displays the text you want to be entered
Finally, the list of Snippets can be organized by editing the number in front of the Snippet title. As numbers are adjusted, the list will be displayed numerically in order.
.
.
.
Cover Page Image
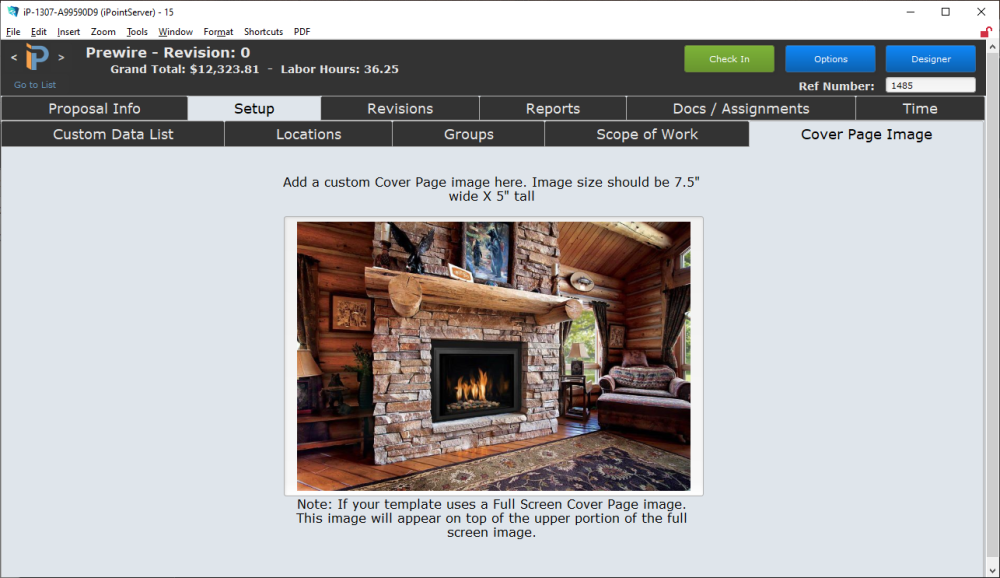
One of the pages you can include when printing a proposal is a Cover Page. The content on the page is defined in Settings > Custom Templates > Cover Page. However, the image on the cover page can be customized per proposal here.
Right-click in the image field to reveal a popup menu. Choosing Insert Picture… opens your computer’s find file window where you can navigate to the image on your computer and upload it here. Alternatively, you can drag the picture from your hard drive to the image field.
A couple of things to note:
- The image dimensions are 7 1/2” wide by 5” tall. If the image you import does not match those dimensions it will be stretched to match the available space which might cause image distortion. It is recommended that you adjust the image in a third-party graphics editor prior to importing it to the proposal.
- If your chosen Custom Template has a full-screen cover image, this image will be printed on top of the full page image and, quite frankly, doesn’t look too good.


