The CRM module holds all of the customers and contacts you have entered into iPoint. This is also the place you will go to find documents related to a specific individual or business. If a document is customer-related, you’ll find quick access to it here.
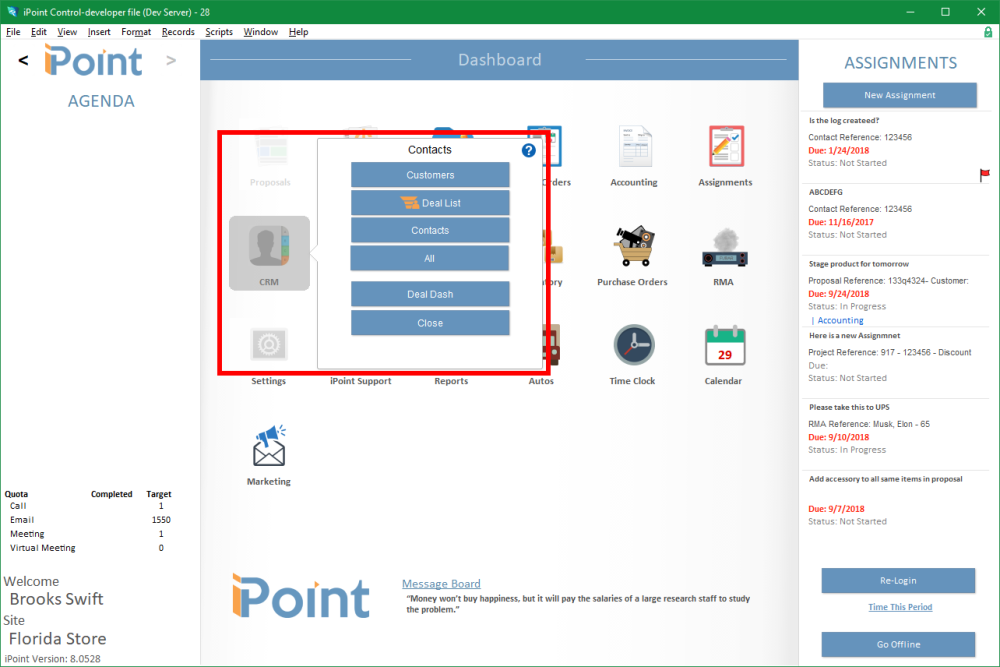
Clicking on the CRM module presents the following options:
- Customers – click this button to open a list of customers – those people who have purchase goods and services from you.
- Deals – this list displays the jobs that are in the sales process and is where you will track the stages of a customer’s interest before they become a paying customer.
- Note: This option is activated in Settings > Module Settings > Beta. So the button will be available if your system administrator has activated it.
- Contacts – this is a list of individuals and organizations that are not customers. People like designers, contractors, and building managers.
- All – clicking this button shows customers and contacts in a single list.
- Deal Dash – this is a user-definable dashboard that displays information on the user’s sales lead process. The dashboard is part of the beta Deals settings described above.
Customers and Contacts Lists
When you click any of the list buttons, you will be taken to a list of individuals and organizations that fall into the customer or contact (or both) categories.
Along with the standard navigation elements you’ll see the following options in the header:
- List Name – this button tells you which list you are viewing. If it shows Customers then you are looking at the customer list. But, this button also lets you switch between list views. so you can choose Deals or Contacts to show those lists. Choose All to display customers, deals, and contacts at the same time.
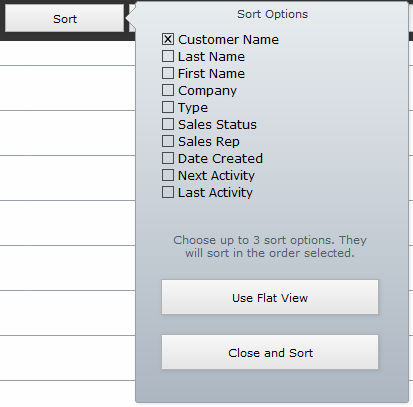
- Sort – the sort button lets you define in what order the contacts will be sorted..
- Check up to three options to further refine the sort. Whatever option you choose first will be the primary sort. The second box checked will perform a “sub”-sort of the first option you chose. Likewise, the third option chosen will provide a “sub”-sort of the second option chosen.
- Each of the sort options corresponds with the field of the same name on the Contact Details screen with the exception of the Next Activity and Last Activity field which is taken from the Activities section.
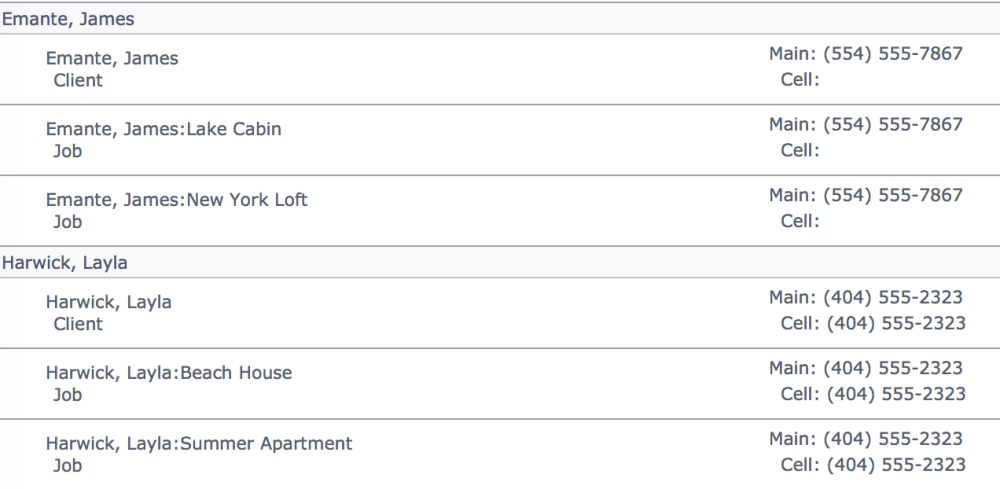
- The Use Flat View button eliminates the indentation of child jobs. When displaying the flat view, the button changes to Use Hierarchical View which, when pressed, nests the jobs under the parent customer.
What Makes a Customer?
Before we jump into the details of the contact list, you will probably be asking, “What is the difference between a customer and a contact?
The basic information and the contact details look the same when comparing customers and contacts. The difference is found when you click on the contact’s options. Down at the bottom right you’ll see a Customer checkbox. If this box is checked, the contact will appear in the customer list. Left unchecked, the contact will appear in the contact list.
Additionally, a Contact will not have any of the sales-related document categories such as Deals, Sales Orders, Projects, Work Orders, RMA Tickets, Estimates, or Invoices. That being said, there is a Proposals section. And creating a proposal for any Contact will automatically change them into a Customer by ticking the Customer Options checkbox. So, sell something to a contact and they become a customer!
The List
Now that you understand the basics of the Customer/Contact list, let’s dig a little deeper into what this list shows:
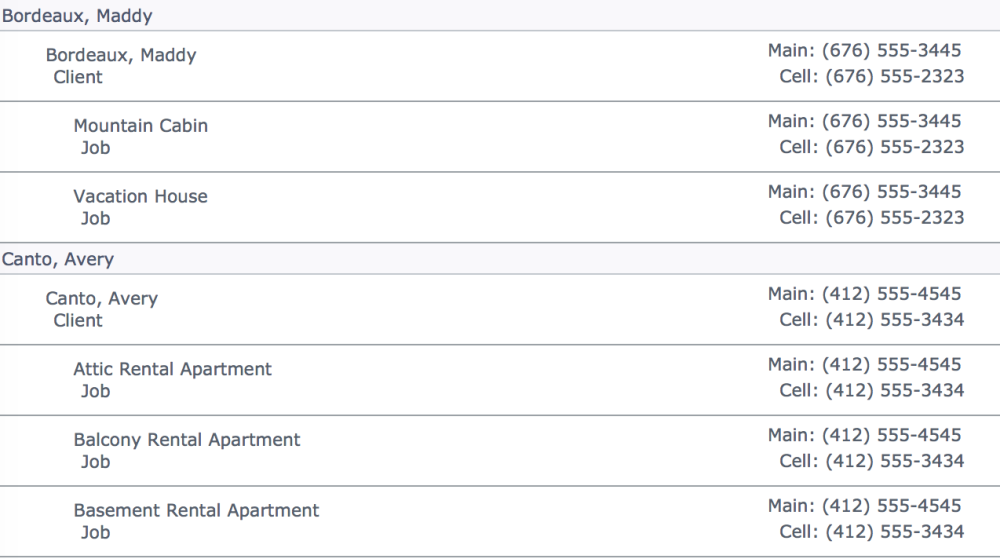
- Contact Name – this is the full name of the customer or business
- Type – each customer will be listed as a Client (typically the parent) or a Job. Jobs are generally indented underneath the client and are usually a secondary physical address for the client, something like a vacation home or a mother-in-law cottage.
- Archived – if a contact has been archived, it will be labeled as such. Archived records can be included or excluded in the list of contacts by choosing the Options button and toggling the Show Archived switch. – New in 9.1226
- Main – the primary phone number for the contact
- Cell – the cell phone number
- Email – the client’s main email address
- Address – this is the primary address, also known as the bill to address.
– the options button opens a popover window with several options available for the individual contact
Customer – this checkbox moves the contact from the Contact list to the Customer list. iPoint will automatically check this box for any contact where a proposal is created.
Archive – a check in this box removes the contact from the active list of contacts or customers. Their history and details are retained, you just have to view archived contacts to see them. This is often used when a customer dies or moves to another part of the world.
- Sync Contact to QB – if you have QuickBooks open, you can push this button to sync the customer for the first time, or to update changes that have been made in iPoint.
- View in QB – again, with QuickBooks open, click this button to open the contact in QuickBooks.
- Reset Contact and Resync – on occasion you might need to disconnect the relationship between iPoint and QuickBooks for a specific contact. Use this button to break the existing and push the contact as a new entity.
- New Job – click this button to create a sub-job underneath this parent. Typically, this is a secondary address like a vacation home or a mother-in-law’s quarters. Some companies create service jobs (instead of the standard service Project).
- Delete Customer – this button removes the contact from the iPoint database. We strongly recommend that you ONLY delete contacts that don’t have any associated records. Deleting a contact is permanent and there is no undo button.
- QB Sync Dot
– indicates that the contact record is synced with QuickBooks
– indicates that the record has been changed since it was previously sent to QuickBooks
– indicates that the contact record did not sync due to an error like a duplicate name in QB
- No Dot – means that the contact has not yet been synced to QuickBooks



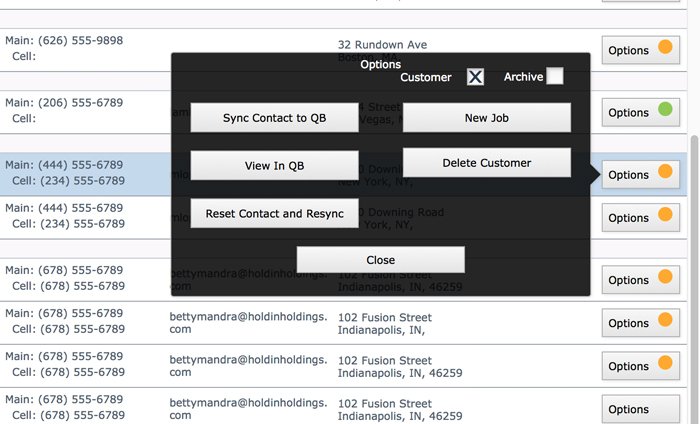
 – the options button opens a popover window with several options available for the individual contact