The second step to creating a marketing campaign is to make the email itself. This is the Email Template and contains the pictures and text you want to send to your contacts.
Template List
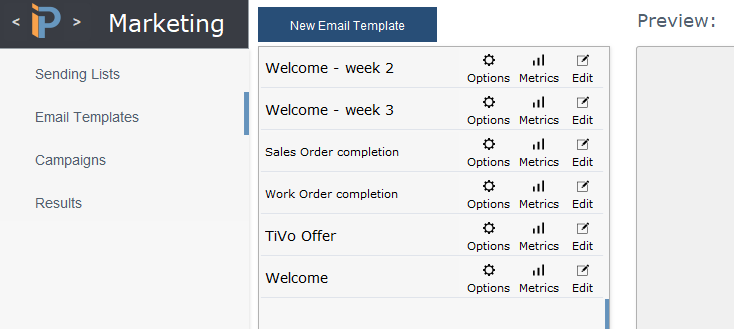
The list of existing Email Templates shows:
- Template Name – a unique name that helps describe what the email is about
- Options – clicking this button gives you the option to:
- Duplicate the template – this is a great way to tweak an existing email without losing the original email.
- Export HTML – you love the iPoint email builder but have a third-party email program you want to use? No problem! This button will save the email as HTML text so you can paste it into another email program.
- Delete – oops! Don’t want this template anymore? One quick click, and it goes away.
- Close the Template Options popover window.
- Metrics – This button opens a popover window that shows the success of this template, including open rates, click-through rates, and bounce rates.
- Edit – on this popover, you can
- change the Email Template Name
- Edit the template in the Designer.
Click on any Email Template name to preview it on the right side of the screen.
New Templates
You create a new Template by clicking the “New Template” button. A popover will appear.
There are two steps (4 if you count opening the popover and clicking “Create”) to creating your new Template:
1. Choose one of the five starting designs which come with iPoint:
- Basic E-Commerce: Has 4 “row” sections, including a content area that adjusts between 1 and 2 columns responsively, depending on the viewer’s screen/window size.
- Basic Newsletter: Like E-Commerce, four rows, but the content area stays in a single column.
- Basic One Column: simplifies that content area to one “article.”
- Basic Standard: similar to One Column, with a few more placeholder images.
- Blank: A blank canvas…no pre-designed elements.
2. Enter a unique name for your Template. Template names must be unique.
Click “Create.” iPoint will save the Template and take you to the Template Editing screen, which opens on your web browser. It may take a few moments to load.
There is extensive online help available for all of the design functions here (see below), but I’d like to point out a few things in particular:
- The Actions menu in the upper left allows you to preview the design, for mobile and desktop, with all the design controls hidden. It also allows you to send a Test message to the email address of the currently logged-on user, which you can see here in the lower left.
- The Save button saves your work back into the Template.
- Save As… allows you to choose a new name and save the current state of the Template as a new Template, leaving the original as it was the last time you pressed “Save.” This could be helpful, for example, if you are working on a Christmas Special marketing piece and you want to create a new one for this year based on last year’s, but you don’t want to lose last year’s. Open last year’s (let’s call it _ “Christmas 2016“) and “Save As…” _ “Christmas 2017.”
- Below “Save As…” you’ll see text letting you know which Template you’re working on.
- The Help button opens your web browser to the help area of Bee’s website. Our email editor is based on Bee’s “Pro” system, so their Help applies to our system. However, when you get to the website, the help area isn’t immediately prominent…scroll down to where it says “Using the Editor.”
Merge Tags
When building a template, you might want to personalize the email with the customer’s name or address. Inserting a tag will pull in the details from your customers’ records.
- When editing a template, place your cursor in a text box to reveal a black format bar where you can change the font, size, format, and justification, to name a few.
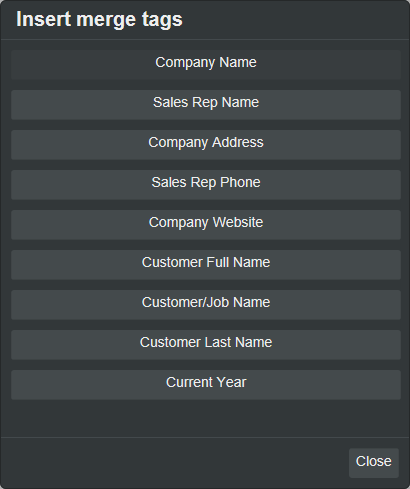
- Click on the Merge Tags button in the second row of the format bar to reveal the available merge tags for your email.
- Company name – the name of your company
- Sales Rep Name – the name of the sales rep associated with the customer
- Company Address – the address of your company
- Sales Rep Phone – the phone number of the sales rep (designated in user settings)
- Company Website – your company’s website address
- Customer Full Name – the first and last name of the customer
- Customer/Job Name – the customer’s first and last name followed by the name of the Proposal/Sales Order
- Customer Last Name – the last name of your customer
- Current Year – the current year (that’s a tough one!)
- Click on a Merge Tag to insert it into the text field where your cursor is positioned.
Here is a short video to help you learn how to edit Email Templates


